Live Activity: Initial Setup
Part 3: Or what I like to call it: TL;DR
 Shawn Roller
November 28, 2024
GuideSuccess
With the design in place, it’s time to set up the foundation for our Live Activity. This involves configuring the project in Xcode, setting up data sharing between the app and the widget extension, and adding some useful debugging tools.
The Basics of Widget Extensions
A widget extension can include:
1. A Widget: Displays glanceable information.
2. A Control: Allows interaction directly from the widget.
3. A Live Activity: Provides real-time updates, such as our sauna reservation.
For simplicity, we’ll focus solely on the Live Activity and remove boilerplate code for Widgets and Controls.
Getting started
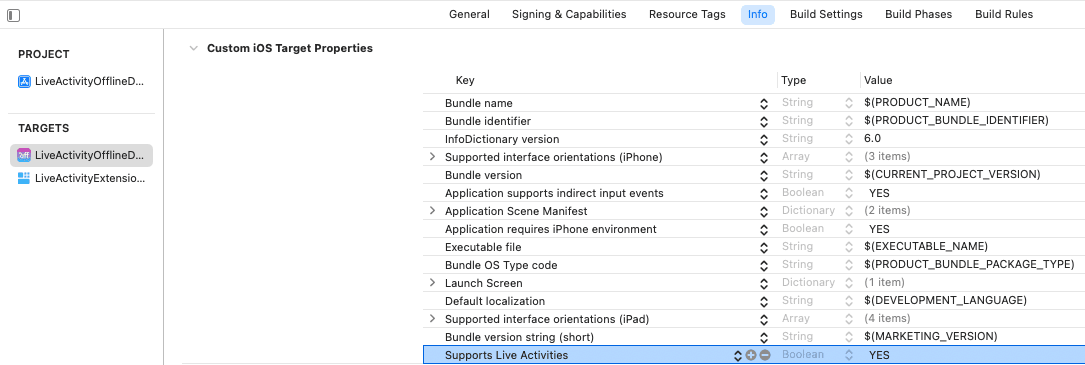
Let’s get started - I’ll added a new WidgetExtension Target to my main app, ensuring “Include Live Activity” is selected. On your main app target you’ll need to add Supports Live Activities to the Info.plist.

For my purposes I’m going to ignore (aka delete) the boilerplate related to the Widget and Control, and keep only the code and files related to the Live Activity.
Shared Attributes
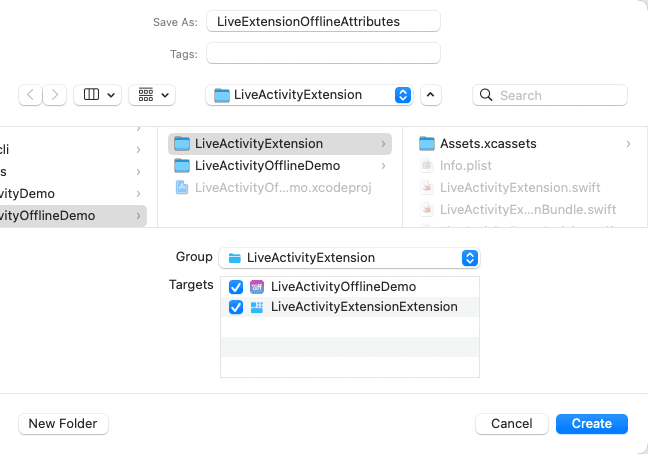
To start, I’ll create a new file for my extension which will keep my activity’s attributes and state, and remove it from the top of the …LiveActivity.swift file.
1import Foundation
2import ActivityKit
3
4struct LiveActivityExtensionAttributes: ActivityAttributes {
5    public typealias LiveActivityState = ContentState
6
7    public struct ContentState: Codable, Hashable {
8        // Dynamic stateful properties about your activity go here!
9        var emoji: String
10    }
11
12    var startTime: Date
13    var endTime: Date
14    var name: String
15    var image: String?
16    var id = UUID()
17}
Ensure you add this file to your main app target as well as your extension - it’s how we’ll reference the properties of the Live Activity from the app.

Shared Space
We’ll use the shared space between the main app and our extension in order to access image data (in a later post). But let’s get the shared space configured. We’ll add an App Group to both the main app target and the widget extension. Follow the developer docs to get it setup.
App Groups can enable sharing data between multiple apps by the same developer and also between apps and their extensions, so a bit of thought needs to be put into how to structure the data in the shared space in some circumstances. It can be challenging to migrate to a new structure if several apps depend on it.

URL Scheme support
In order to support opening your main app from the extension / Live Activity you’ll want to add a Custom URL Scheme. Reference that link if you want to go into the details, but for my purposes I’m going to use a scheme of lademo which I can reference like this to open the app: let URLPrefix = "lademo://"
You can also pass in parameters to which your main app can action on, like this: lademo://pageId?12345
In the …LiveActivity.swift file you can specify the URL to open when the activity is tapped by adding a .widgetURL modifier to the body: .widgetURL(URL(string: URLPrefix))
And you can also add buttons to your Live Activity using Link and specify the URL and params you want to open. For example, you can have multiple buttons in your Live Activity that open different parts of your app. More details in a later post and in the official documentation.

Preview
I’m going to add a new view to my extension called LogoView.swift. I’m going to use this in a later post, but I want to demonstrate a little snag with it up front.
1struct LogoView: View {
2    var body: some View {
3        Image(systemName: "heart.fill")
4            .resizable()
5            .scaledToFit()
6            .foregroundStyle(Color.post)
7    }
8}
9
10#Preview {
11    LogoView()
12}
You’ll notice that you’ll get an error in the Preview canvas complaining about widget this or that. The issue is that the widget target requires a widget context in order to build the previews. A perfectly acceptable workaround is to add your main app target to the standalone views. This will enable the preview to function properly.
A side note here is that you need to be careful about your assets now: keep in mind that the preview is using your main app target’s assets, but when you run your app, the Live Activity will be using the assets from your widget extension target. Which could lead to some differences in your UI between preview and runtime.

Debugging
We haven’t gotten around to actually running our Live Activity yet, but I’ll make a note here about debugging. I’ve found debugging extensions to be hit-and-miss, which is a shame because if you get something wrong in your Live Activity, it just won’t render and you’ll be left in a lurch trying to figure out what happened.
Apple has official documentation around debugging widgets and this is all well and good when it’s functioning properly. But I have hit points in my projects where debugging just stops working altogether, which can be really frustrating.
I have a handful of tips:
Try to attach the debugger as outlined in Apple’s docs above
Use the Devices & Simulators tool in Xcode to view the live logs from the simulator or device you’re using
This can help you see your
printstatements in your extension to try to pinpoint what is going wrong
In this specific Live Activity example, if we try to start a ProgressView at a date in the past, the Live Activity simply won’t render - be careful with your dates
When all else fails, try to move the logic to your main app in an attempt to figure out what’s going on
Up next
Next up: I’ll share the solution for downloading, caching and ultimately displaying remote images in the Live Activity extension.
All the source code for this series is on Github!

